Compatibility
The RFID in Rail app shall be used on an iOS or Android device. It works together with TSL RFID-readers of type TSL1128, TSL1153 and TSL1166. See Services for details.
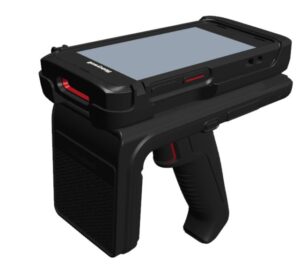
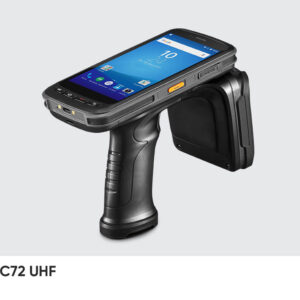
On Android devices, it’s now able to use Honeywell IH40 Reader and Chainwell C72 reader.

Getting started
First time you start the RFID in Rail app you need to make some settings.
- Android
- IOS
To connect a reader touch the button ”Tap to select reader…”

If no reader is connected you push the ”+”-button.
Otherwise just tap on your desired reader.
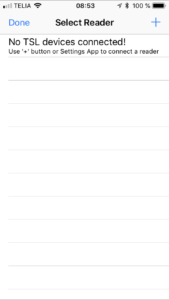
Make sure the reader is switched on and that bluetooth is enabled on your device.
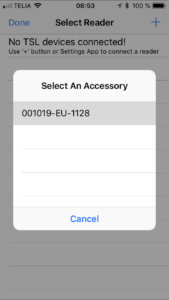
After a few seconds your reader(s) shall appear in the Accessory-table. Select the desired accessory to continue and tap on it again in the Reader-table.
If unable to connect the device try to connect it manually in the settings of your device.
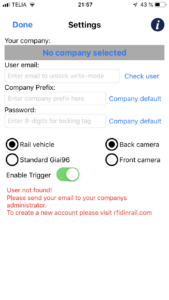
Settings
Tapping on the gear-symbol in the main view opens ”Settings” where you can set up your user and company specific settings. On top of the ”Settings” view you can reach this help-page as well by tapping on the ”i”-button.
Enter your email-adress and your license will be controlled. This is the only stage where internet-connection is needed.
If your email-address is not valid your for the current RFID-device your user-email must be registered. Your company’s administrator shall send users email-address to us to enable your license. If you need to change device or add an extra device to your account it can be handled as well. One user can have many devices and a user can represent many companies, but each combination requires a license.
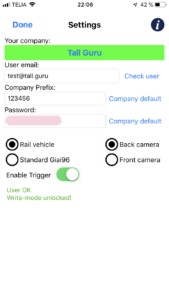
If your device and user are registered you will see your company name on top of the view. This is where you tap to change company if you’re representing several companies.
The registered company prefix will automatically be presented automatically. This can be exchanged manually if desired. Changing company, tapping ”Check user” or ”Company default” will change to the registered company prefix.
A company-specific password will be generated by default as well. The value can be exchanged manually but must be eight digits. This password is used to lock the RFID-transponders.
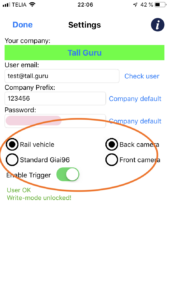
It is also possible to select type of usage in ”Settings”.
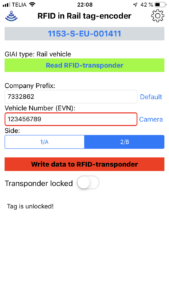
”Rail-vehicle” shall always be used when encoding transponders for rail-vehicles. This mode has features for selecting side and has auto-check of the EVN (vehicle number) by calculating the check sum. It also sets filter value to 1 according to the standard.
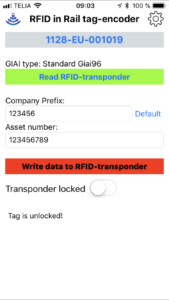
”Standard Giai96” shall be used for all other assets such as components etc. It can be used outside the rail-business as well if desired. This mode disables the side-selector and enables an optional number of the asset.
”Back camera” is default for text recognition but can be change to ”Front Camera” to be able to us together with a mount on the RFID-reader.
The trigger on the RFID-reader is enabled by default but can be disabled though some older devices can have performance issues.
Operations
This is the view you will be heading each time you start the app after settings has been achieved.
Read data
When a reader is connected it is possible to read an RFID-transponder by tapping ”Read RFID-transponder” or by pressing the trigger on the reader.
If more than one transponder responds you will receive an error-message. Make sure no more than one transponder is in sight of the reader and try again.
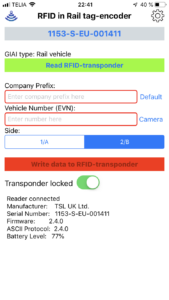
When a transponder is read its information (EPC-content) will be shown. It will be divided into ”Company Prefix”, ”EVN” and ”Side” if the ”Rail vehicle mode” is selected. If filter value is deviated from 1 a warning will appear and you will be prompted to push ”Write” to correct.
If ”Standard Giai96 mode” is selected the company prefix and the asset number will be shown.
This mode is valid for rail vehicle as well though they fulfill the Giai96-standard. Using this mode for rail vehicles is still not recommended though filter value will be incorrectly if writing data to the transponder.
Text recognition
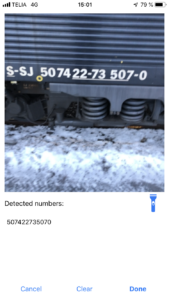
The camera on your device can be used to recognize EVN directly on the vehicle by text recognition (OCR). Back camera is default but can be change in ”Settings”
Simply push the button ”Camera” to enter the mode (if first use you must approve the app to use the camera). The app looks for valid EVN numbers in site and will create a list with detected numbers. Press ”Done” when the number appears.
If more than one number is detected you need to choose the correct one in a list.
Write data
Data to be written shall be entered in ”Company Prefix”, ”EVN” and ”Side”
The default company prefix, which is set in ”Settings”, can be chosen by tapping the ”Default”-button next to the field.
The length of company prefix shall 6-12 digits which is validated continuously while typing.
EVN must be 12 digits which is validated together with the check sum to ensure quality.
Side is selected by tapping 1 or 2 in the selector.
Tap ”Write data to RFID-transponder” when everything is set and a message will appear to ensure everything was correctly written.
Lock transponder
By locking a transponder you make sure no one can change its content without having the correct password. If the transponder is locked you must first unlock it with the correct password to change its value.
Make sure you have the transponder in sight and change the ”Transponder locked-switch”.
The transponder will be locked and the state of the switch will be changed.
To unlock the tag just change the switch in opposite direction.
All operations and changes will respond status in the text field at the bottom of the view.
If you are unsure of the use please contact info@tall.guru to get instructions.